In this blog, you will learn about the importance of ensuring resource sharing within the development environment to make it both efficient and effective. Most web browsers, unfortunately, implement the same-origin security policy that prevents web pages from calling APIs from different domains, hence the need for Cross-Origin Resource Sharing (CORS).
CORS is an HTTP functionality that can be deployed to achieve this goal. It allows web applications running in different domains to access and share resources. While allowing for effective resource sharing, the technique also reduces the possibility of cross-site scripting attacks. Read through to read more about CORS and Azure Developer Associate certification.
The CORS Functional Architecture
The following architecture shows how CORS allows a server to say which origins are allowed to ask for resources. On the one hand, you have an SPfx webpart that lives on a SharePoint site ‘yourdomain.sharepoint.com’. On the opposite side you have an azure function that is resident in your Azure environment.
CORS controls cross-origin requests initiated by client-side web scripts. The challenge with havingthe same-origin policy is that it prevents web pages from making requests to different domains. . CORS lessons this restriction by allowing web servers to specify which domains are allowed to access their resources. This means that when a web application running in one domain (origin) makes a cross-origin request to a resource hosted on another domain, the browser sends a preflight request (OPTIONS) to the target domain to check if the actual request (e.g., GET, POST) is allowed. To indicate whether the cross-origin request is permitted or denied, the target server will respond with appropriate CORS headers.
Enabling CORS in Microsoft Azure
When you deploy your Azure function to Azure, you can configure the CORS settings of the functional app where the function is resident. However, as long as it is running locally, your app is restricted from accessing other apps. Once you set the CORS rules, then a properly authorized request made against the service evaluates from a different domain to determine whether it is allowed according to the rules you have specified. However, in this blog we will focus on the use of Azure Functions.
Enabling CORS using Azure Functions.
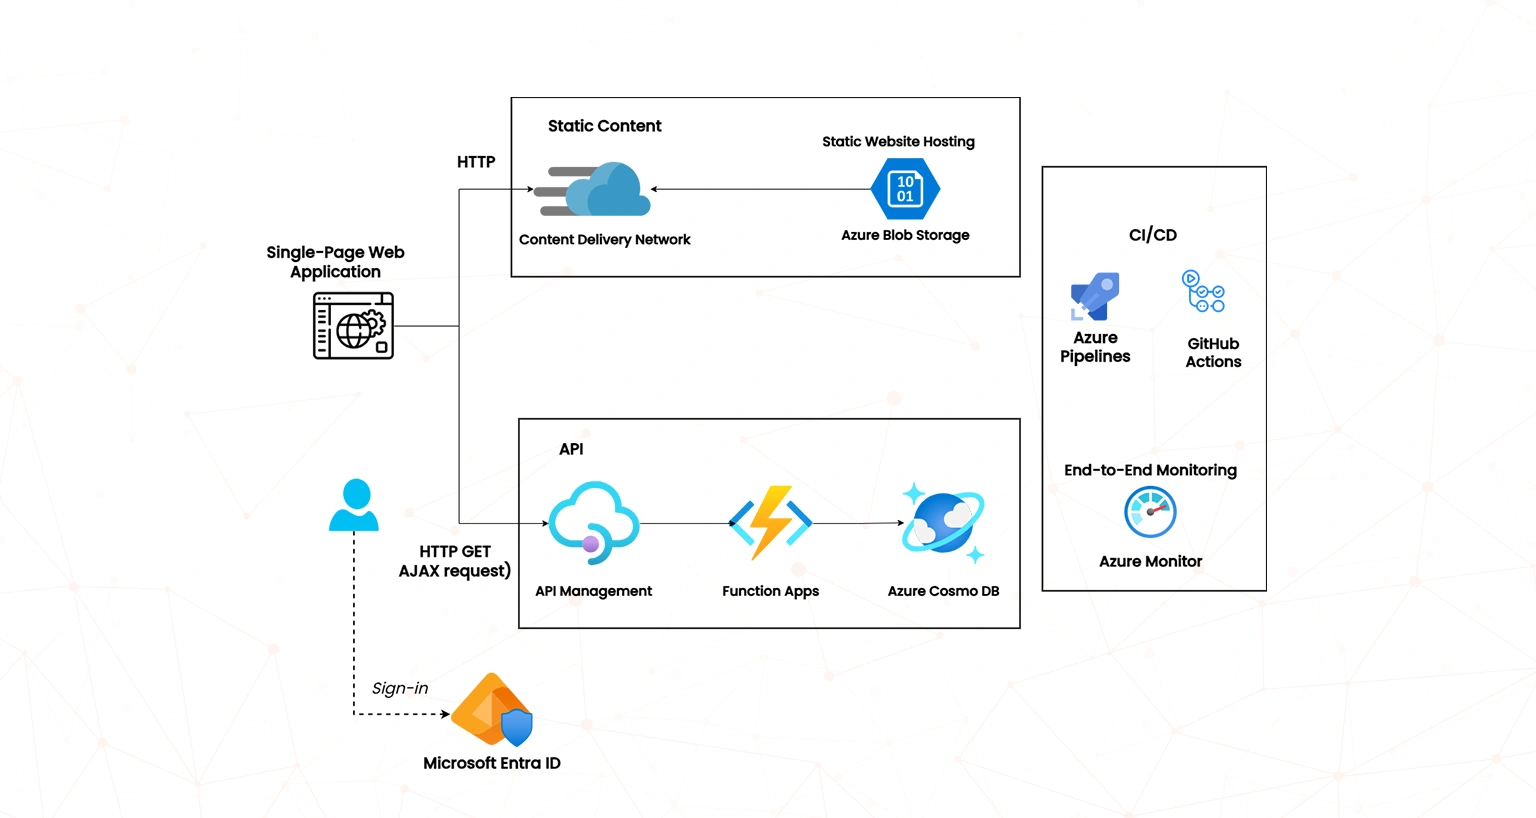
Azure Functions is a cloud-based compute service in Azure what is deployed to provide scalable serverless compute for Azure. The diagram below shows where Azure Function fits in the overall Azure cloud architecture;
As shown in the diagram above, Azure Functions is part of the API ecosystem consisting of a compute option where some piece of code (called a “function”) is invoked by a trigger. For instance, you can involve a function by making a HTTP request. It is crucial to register such domains in the allowed regions in the Azure Function to enable access by other domains. To enable CORS using the Azure Functions feature, you can use either the Azure Portal Method or the Azure CLI;
Enabling CORS through the Azure Portal (Primary Method)
The Azure portal is the primary method of enabling CORS using Azure Functions and includes the following steps;
- Log into the Azure Portal: The first step is for you to log on to the Azure Portal. To achieve this, go to the Azure Portal and log on using your Microsoft identification and authentication credentials. Sometimes, you may not have an existing and active Azure account yet. In this case you can create one for free at https://portal.azure.com and upgrade when necessary.
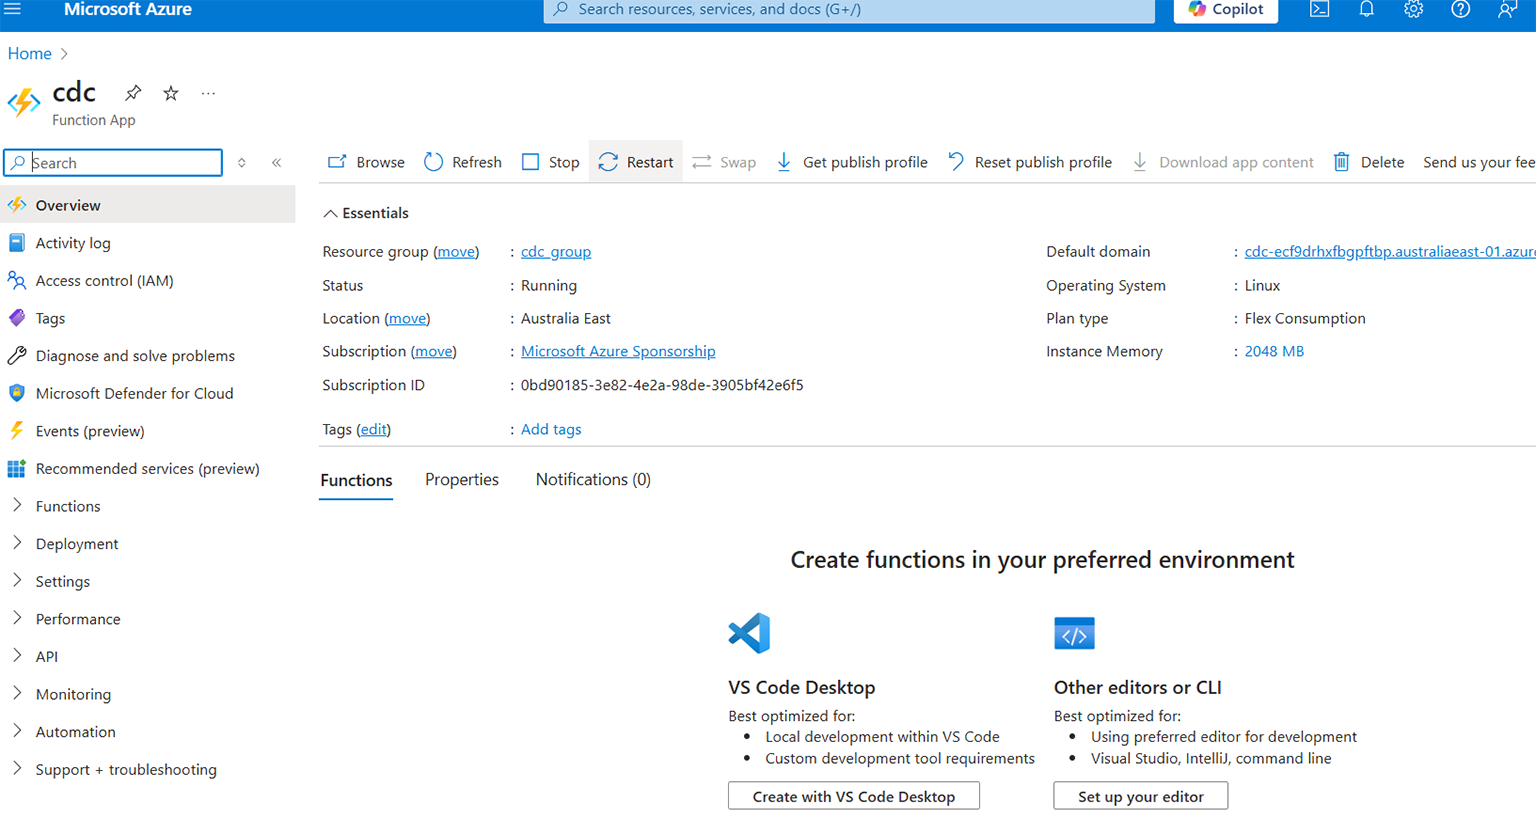
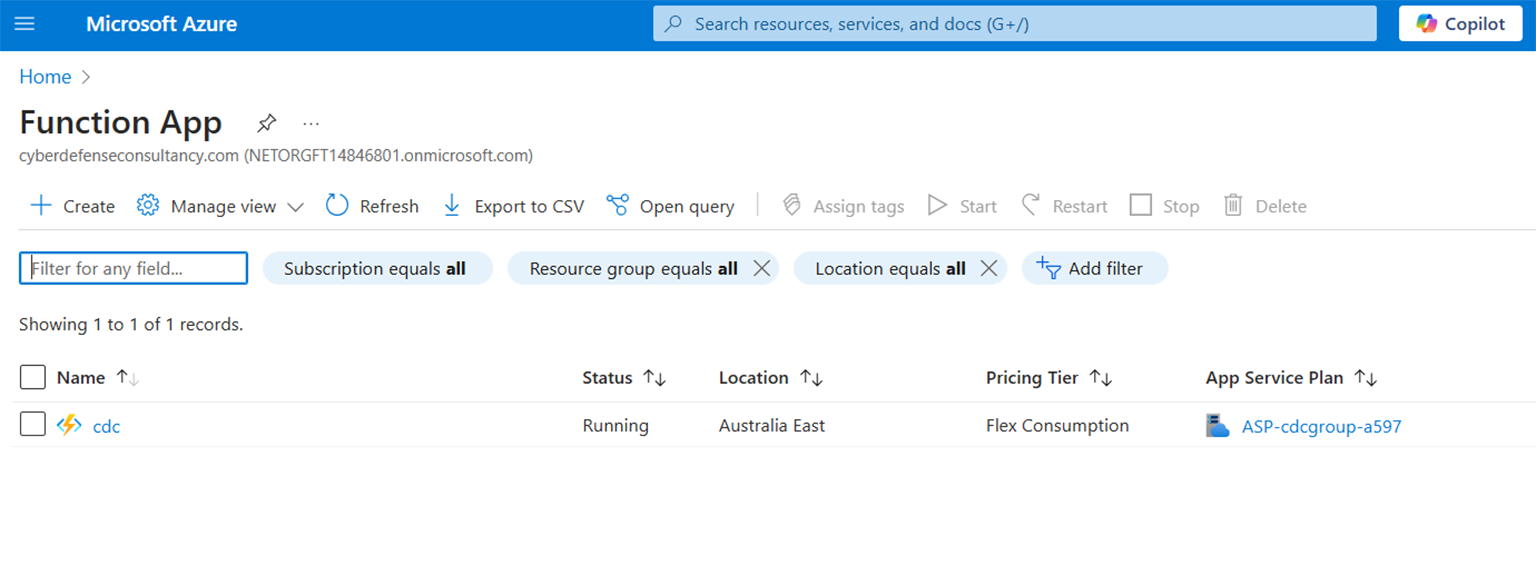
- Locate and access your Function App: Once you have successfully logged onto the portal, you can proceed to access your Function App through the search bar that is located at the top of the Azure portal. Simply type the name of your Function App and select it from the search results. For example, searching the cdc Function App revealed the following results.
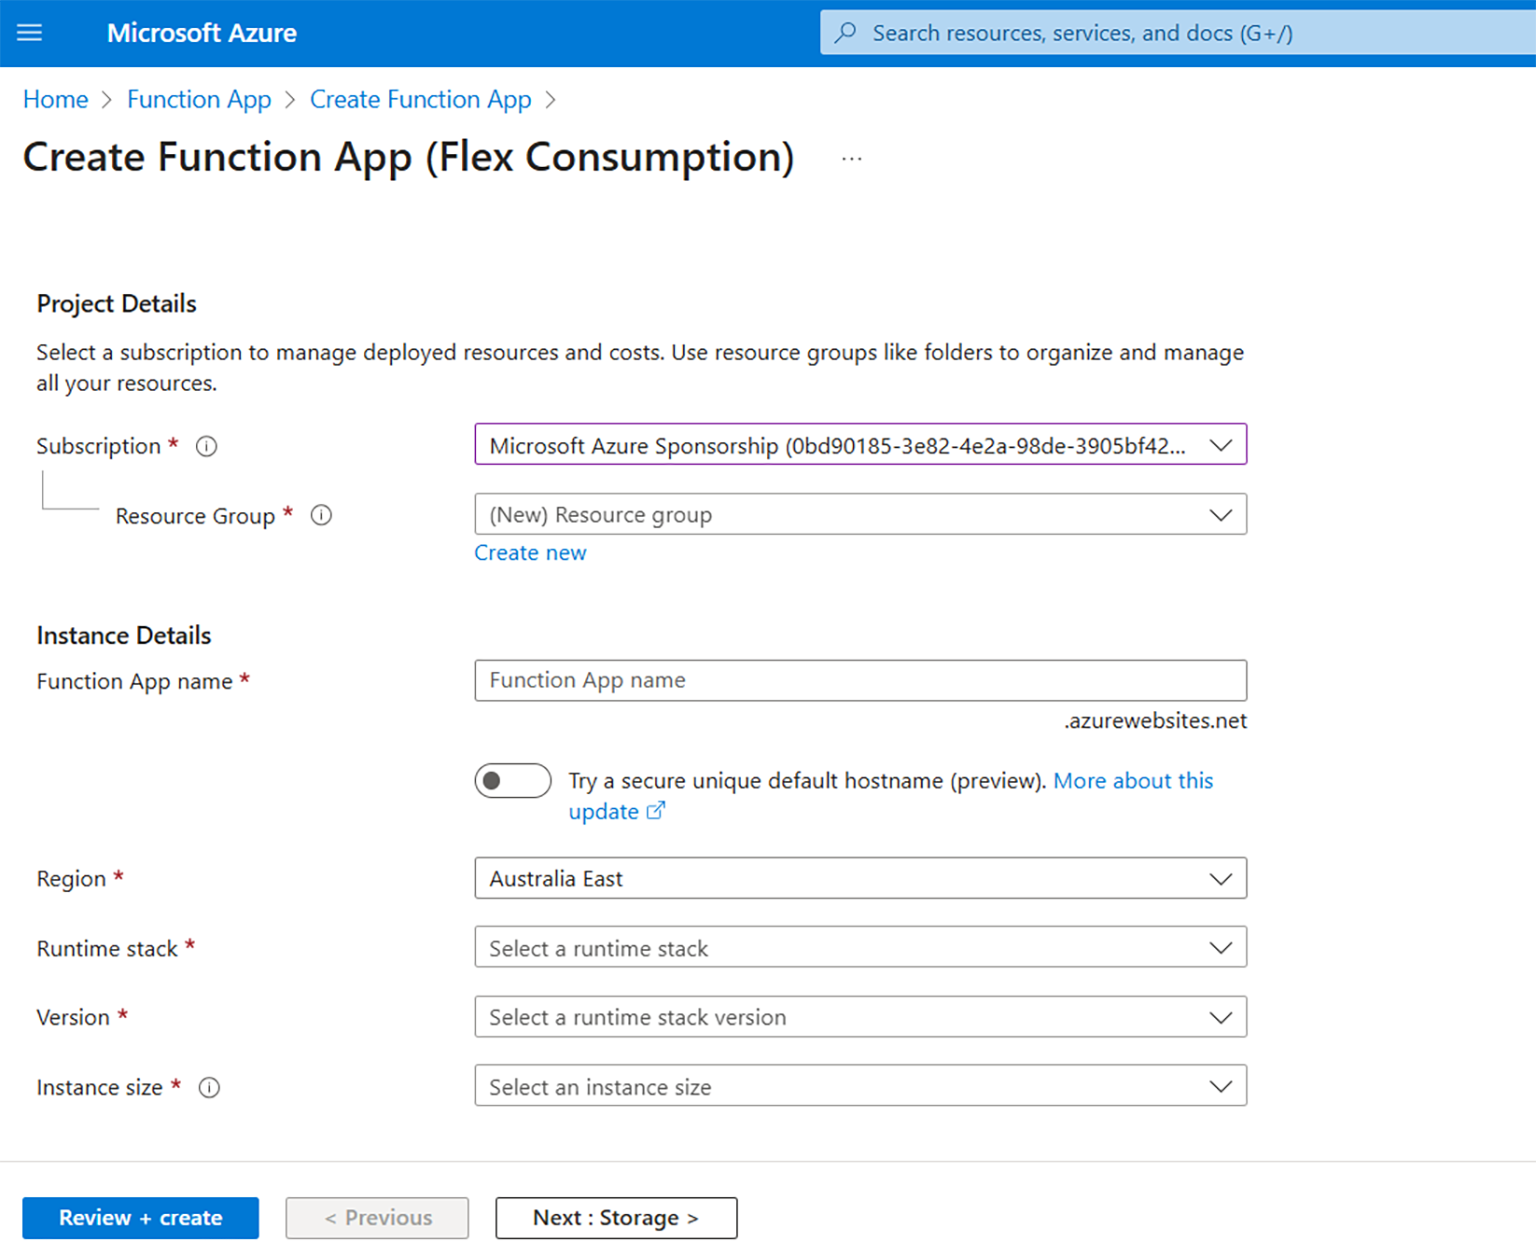
You can also create a Function App if you do not have an existing one. In creating a Function App, you follow the following steps;
- Search the Function App: From the search bar, type Function App and a create option will show as shown below;
- Create Function App: When you click Create, the various options will come up followed by the following tab. You then proceed to populate it accordingly
- Navigate to the Function App. Now that the Function App is available, the next stage is for you to enable the required configurations. Open Function App to reveal its various options. Several options will show up listed on the left-hand side of the page.
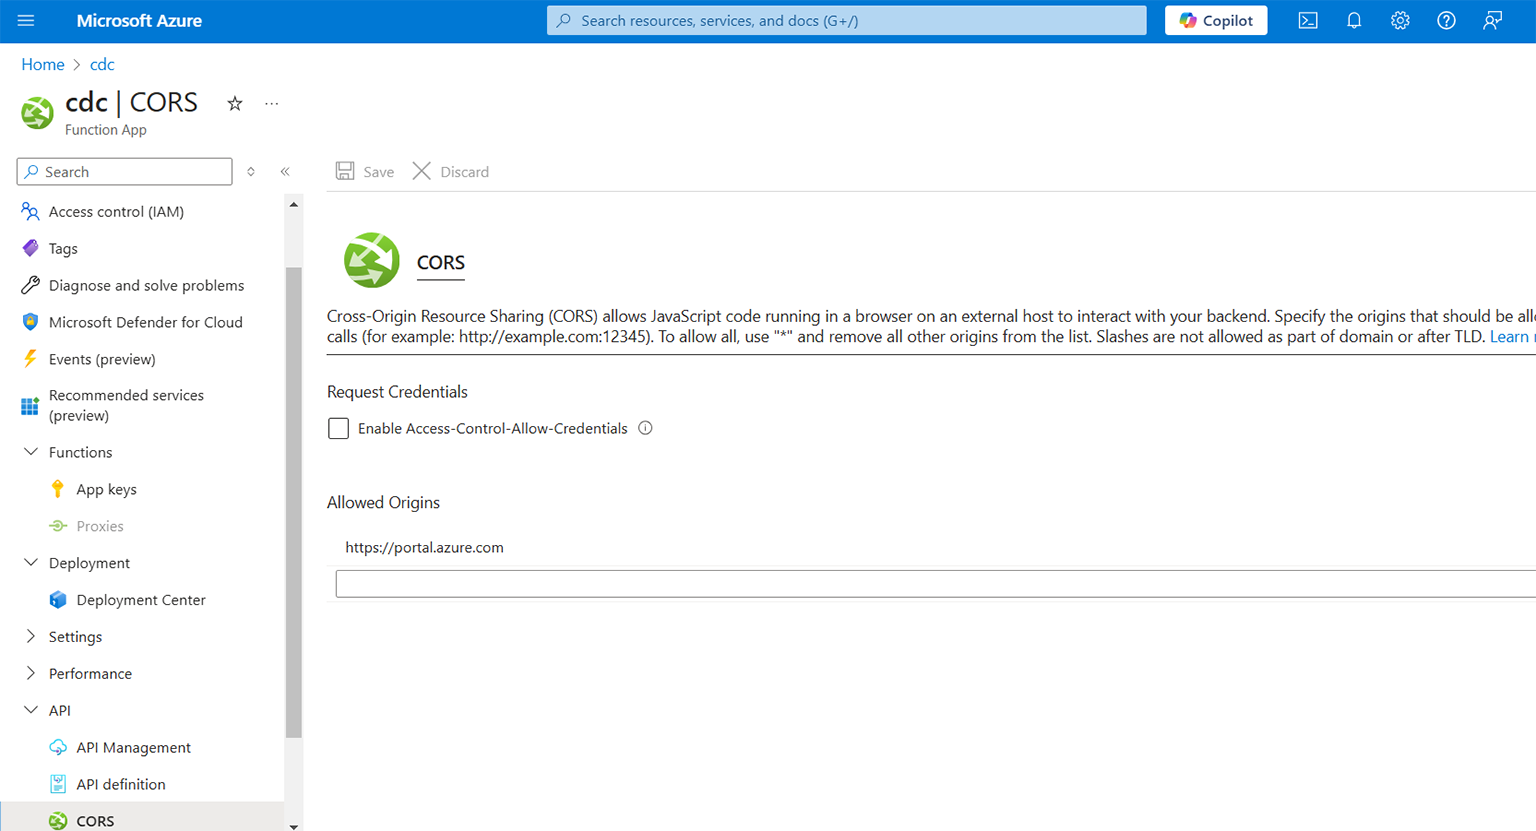
- Select “API”: In the menu on the left side of your Function App’s page, you will see several options. Scroll down to the “API” section and select “CORS.” This navigation will open a page with various settings and configurations for your Function App as depicted below;
- Configure CORS: Once you have selected the CORS option, you can now manage the origins that are allowed to access your Function App. In the text box that appears, enter the domain URLs that you want to allow access to your function app. For instance, if you want to allow https://portalcdc.com. If you wish to enter many domains, you can enter them separated by commas. You should ensure that you only add trusted origins to avoid security risks.
- Save Changes: After successfully adding the allowed origins, click the “Save” button at the top of the page to apply the changes. Your Function App is now able to accept requests from the specified origins.
Enabling CORS using the Azure Command Line Interface (CLI) (Alternative Method)
If you prefer using the alternative method, you can enable CORS for your Function App using the Azure CLI. This method is recommended when you are skilled in coding/programming. You can follow these steps:
- Installation: Firstly, you should confirm and ensure you have the Azure CLI properly installed and configured. If you do not have the Azure CLI already installed, you can proceed to download from https://docs.microsoft.com/en-us/cli/azure/install-azure-cli and install.
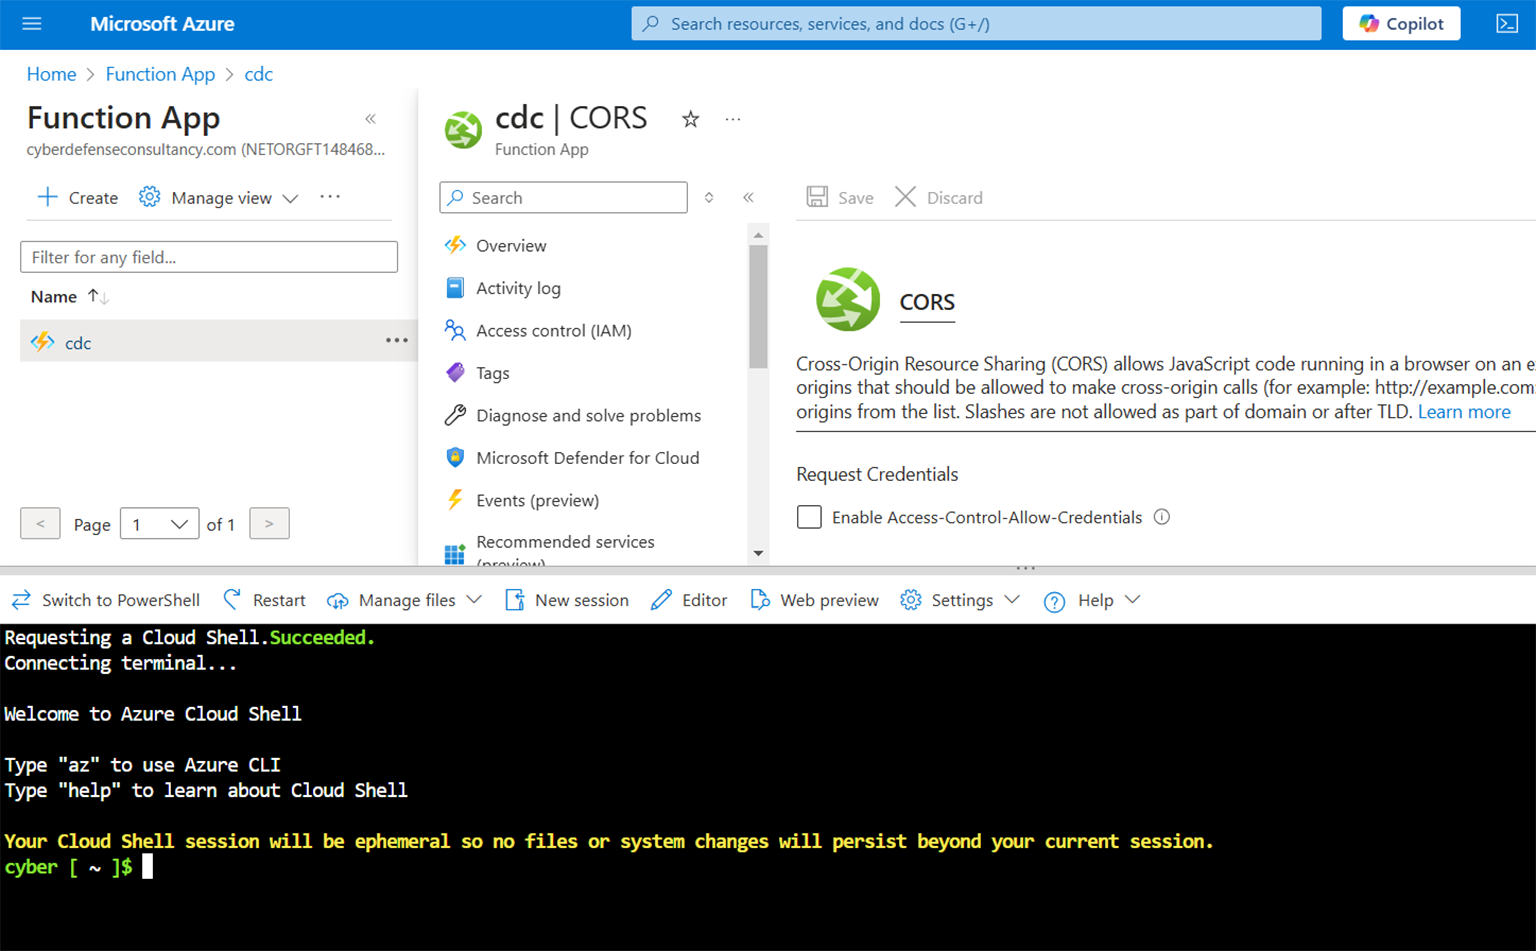
- Open Command-Line Interface (CLI): The CLI in Azure is varied and typically includes be Command Prompt, PowerShell, or any other terminal. On the top menu find the CLI icon (in this case as shown below just after the Copilot icon) and click. The CLI will appear as shown below;
- Add Allowed Origins: Use the following command to add allowed a CORS rule to your Function App:
az function-app cors add –allowed-origins https://yourdomain.com –name YourFunctionAppName –resource-group YourResourceGroupName
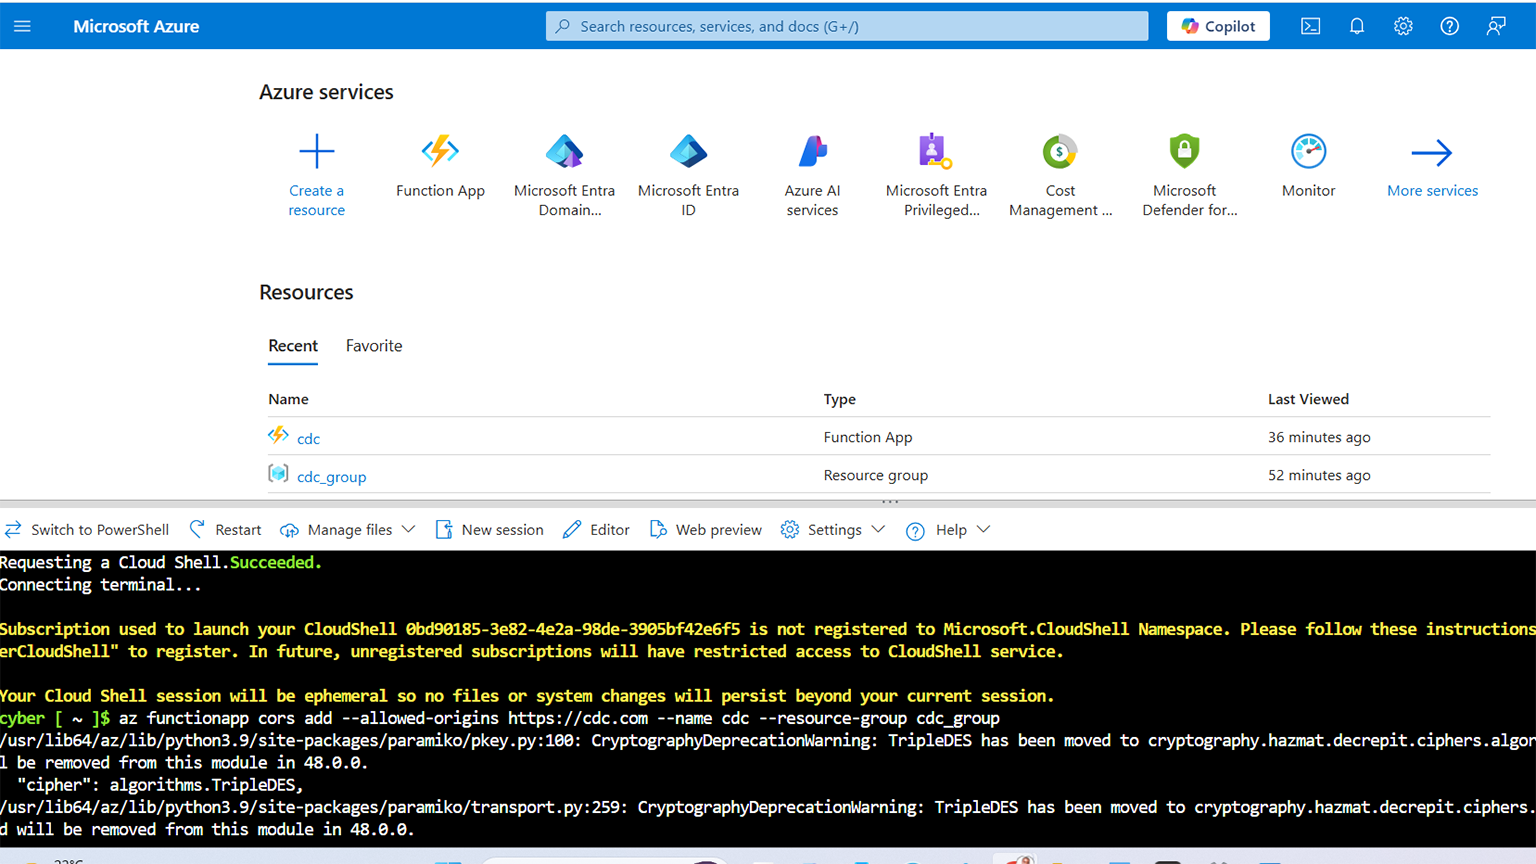
Please note that the above syntax is a general rule and will need you need to replace the https://yourdomain.com , YourFunctionAppName, and YourResourceGroupName with your actual domain name, function app name, and resource group name, respectively. An example is shown below using the ‘cdc’ domain name.
az functionapp cors add –allowed-origins https://cdc.com –name cdc –resource-group cdc_group
Save Changes: Finally, you save the changes; you have successfully enabled CORS.
Best Practices for Using CORS on Azure
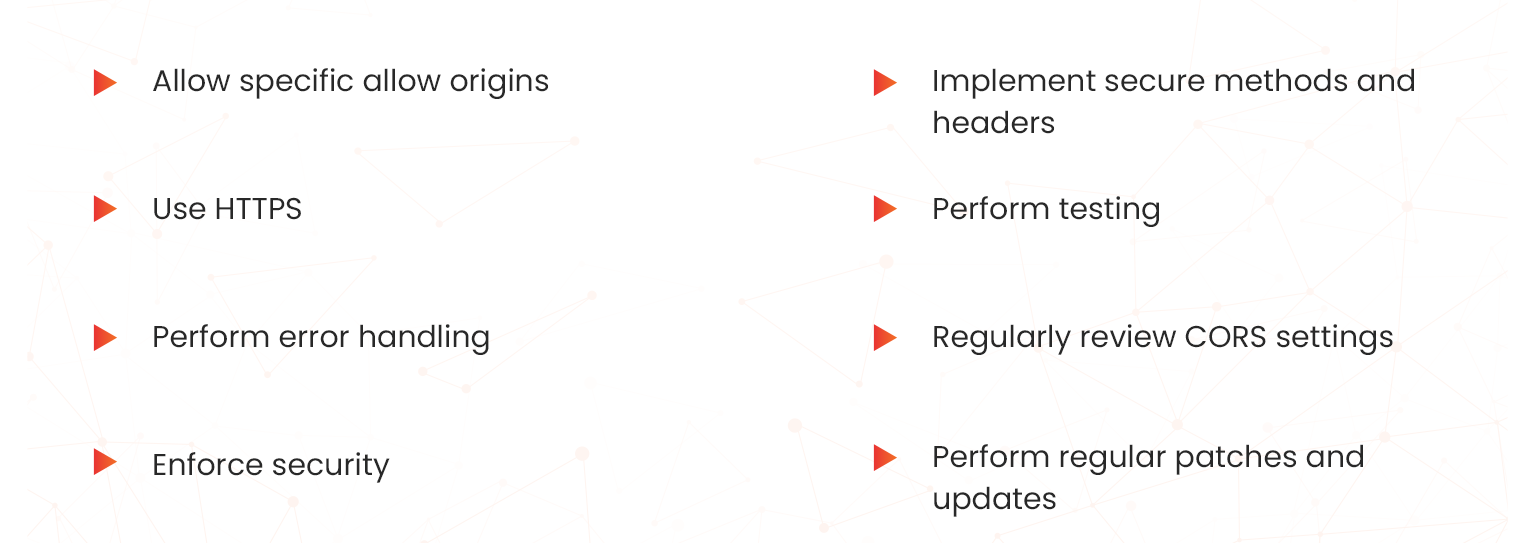
You should implement and observe sound cloud security practices when using CORS on Azure. The following are some of the best practices you should be aware of and adhere to then configuring CORS on Azure;
- Allow specific allow origins: You should avoid allowing all origins (*) as this increases the risk of unauthorised access. Rather, specify the exact domains that require access to your resources.
- Implement secure methods and headers: To reduce the attack surface, ensure that you allow only the necessary HTTP methods and headers required by your application. Limiting unnecessary methods and headers reduces the attack surface and minimizes the risks of attacks.
- Use HTTPS: Strong encryption is key throughout the process, and you should always use HTTPS to encrypt data during cross-origin communication. This assists in ensuring data privacy and security within your cloud environment.
- Perform testing: Ensure that you properly and effectively evaluate and validate preflight requests and settings during and after the configuration process. This ensures they all your to ensure your CORS configuration settings are correct and functioning as required.
- Perform error handling: Implement appropriate error handling for CORS-related issues so that you are able to correct errors before they affect your cloud environment. Also ensure that the error handling process provides you with meaningful error messages when cross-origin requests fail to assist in rectification
- Regularly review CORS settings: Monitoring is key in the CORS configuration process. You should periodically review your CORS settings to ensure that they align with your application’s requirements as well as the security policies. Any deviations should be immediately addressed to maintain and enhance the security posture.
- Enforce security: To enhance security, avoid using wildcard (`*`) in production environments as they can disturb live cloud operations. Best practice is to specify exact domains for tighter security.
- Perform regular patches and updates: Do not forget to always patch and update your CORS settings on a regular basis as and when required. This is especially true and necessary in times of critical changes in the Azure cloud environment such as whenever you add a new client application that needs to access your Azure Function.
Get familiar with CORS as an Azure Developer Associate – AZ 204 with Whizlabs cloud learning materials and ace your career with strong foundations.
Conclusion
Azure Function is a simple meths to add and configure CORS in Microsoft Azure amongst a variety of methods that can be implemented.. You have the option of using the Azure portal and the CLI to enable CORS in therefore providing flexibility to the user based on preferences and skills. It is also important to observe best practices during the configuration process to presence incidences of errors and bugs.
- How to Enable CORS for Azure Functions? - January 24, 2025
- How Microsoft Entra ID Simplify Developer Authentication? - January 21, 2025
- What Role Does Azure Redis Cache Play in Reducing Latency? - December 27, 2024
- Master Cloud Management with Azure Resource Architecture - December 2, 2024
- Microsoft Defender: Your Key to Azure Security Management - November 26, 2024
- What is Microsoft Entra ID and How It Enhances Security - November 26, 2024
- How to Build Secure Networks with Azure Virtual Networking - November 20, 2024
- Step-by-Step Nginx Deployment on Azure Kubernetes Service - November 13, 2024


